Building a multi-room chat application with Laravel and Centrifugo

In this tutorial, we will create a multi-room chat server using Laravel framework and Centrifugo real-time messaging server.
Authenticated users of our chat app will be able to create new chat rooms, join existing rooms and instantly communicate inside rooms with the help of Centrifugo WebSocket real-time transport.
This tutorial was written for Centrifugo v3. We recently released Centrifugo v4 which makes some parts of this tutorial obsolete. The core concepts are similar though ��– so this can still be used as a Centrifugo learning step.
Application overview
The result will look like this:
For the backend, we are using Laravel (version 8.65) as one of the most popular PHP frameworks. Centrifugo v3 will accept WebSocket client connections. And we will implement an integration layer between Laravel and Centrifugo.
For CSS styles we are using recently released Bootstrap 5. Also, some vanilla JS instead of frameworks like React/Vue/whatever to make frontend Javascript code simple – so most developers out there could understand the mechanics.
We are also using a bit old-fashioned server rendering here where server renders templates for different room routes (URLs) – i.e. our app is not a SPA app – mostly for the same reasons: to keep example short and let reader focus on Centrifugo and Laravel integration parts.
To generate fake user avatars we are requesting images from https://robohash.org/ which can generate unique robot puctures based on some input string (username in our case). Robots like to chat with each other!


We also have some ideas on further possible app improvements at the end of this post.
Why integrate Laravel with Centrifugo?
Why would Laravel developers want to integrate a project with Centrifugo for real-time messaging functionality? That's a good question. There are several points which could be a good motivation:
- Centrifugo is open-source and self-hosted. So you can run it on your own infrastructure. Popular Laravel real-time broadcasting intergrations (Pusher and Ably) are paid cloud solutions. At scale Centrifugo will cost you less than cloud solutions. Of course cloud solutions do not require additional server setup – but everything is a trade-off right? So you should decide for youself.
- Centrifugo is fast and scales well. It has an optimized Redis Engine with client-side sharding and Redis Cluster support. Centrifugo can also scale with KeyDB, Nats, or Tarantool. So it's possible to handle millions of connections distributed over different Centrifugo nodes.
- Centrifugo provides a variety of features out-of-the-box – some of them are unique, especially for self-hosted real-time servers that scale to many nodes (like fast message history cache, or maintaining single user connection, both client-side and server-side subscriptions, etc).
- Centrifugo is lightweight, single binary server which works as a separate service – it can be a universal tool in the developer's pocket, can migrate with you from one project to another, no matter what programming language or framework is used for business logic.
Hope this makes sense as a good motivation to give Centrifugo a try in your Laravel project. Let's get started!
Setup and start a project
For the convenience of working with the example, we wrapped the end result into docker compose.
To start the app clone examples repo, cd into v3/php_laravel_chat_tutorial directory and run:
docker compose up
At the first launch, the necessary images will be downloaded (will take some time and network bytes). When the main service is started, you should see something like this in container logs:
...
app           | Database seeding completed successfully.
app           | [10-Dec-2021 12:25:05] NOTICE: fpm is running, pid 112
app           | [10-Dec-2021 12:25:05] NOTICE: ready to handle connections
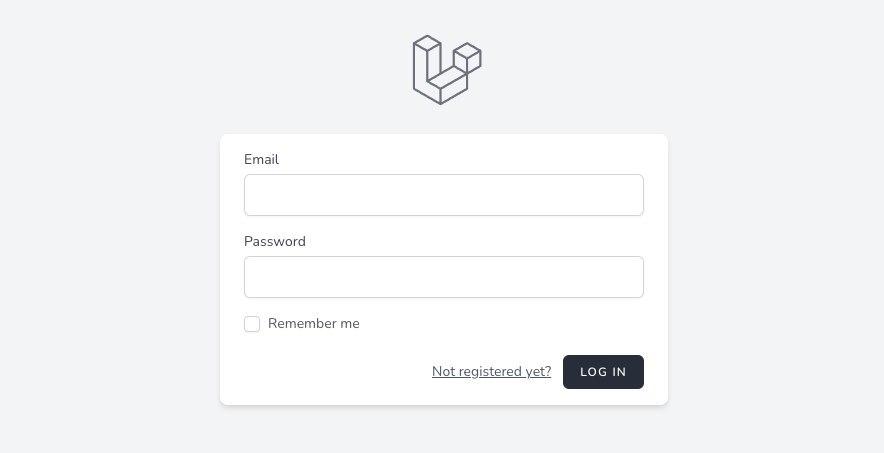
Then go to http://localhost/ – you should see:

Register (using some fake credentials) or sign up – and proceed to the chat rooms.
Pay attention to the configuration of Centrifugo and Nginx. Also, on entrypoint which does some things:
- dependencies are installed via composer
- copying settings from .env.example
- db migrations are performed and the necessary npm packages are installed
- php-fpm starts
Application structure
We assume you already familar with Laravel concepts, so we will just point you to some core aspects of the Laravel application structure and will pay more attention to Centrifugo integration parts.
Environment settings
After the first launch of the application, all settings will be copied from the file .env.example to .env. Next, we will take a closer look at some settings.
Database migrations and models
You can view the database structure here.
We will use the following tables which will be then translated to the application models:
- Laravel standard user authentication tables. See https://laravel.com/docs/8.x/authentication. In the service we are using Laravel Breeze. For more information see official docs.
- rooms table. Basically - describes different rooms in the app every user can create.
- rooms many-to-many relation to users. Allows to add users into rooms when
joinbutton clicked or automatically upon room creation. - messages. Keeps message history in rooms.
Broadcasting
For broadcasting we are using laravel-centrifugo library. It helps to simplify interaction between Laravel and Centrifugo by providing some convenient wrappers.
Step-by-step configuration can be viewed in the readme file of this library.
Pay attention to the CENTRIFUGO_API_KEY setting. It is used to send API requests from Laravel to Centrifugo and must match in .env and centrifugo.json files. And we also telling laravel-centrifugo the URL of Centrifugo. That's all we need to configure for this example app.
See more information about Laravel broadcasting here.
As an alternative to laravel-centrifugo, you can use phpcent – it's an official generic API client which allows publishing to Centrifugo HTTP API. But it does know nothing about Laravel broadcasting specifics.
Interaction with Centrifugo
When user opens a chat app it connects to Centrifugo over WebSocket transport.
Let's take a closer look at Centrifugo server configuration file we use for this example app:
{
  "port": 8000,
  "engine": "memory",
  "api_key": "some-long-api-key-which-you-should-keep-secret",
  "allowed_origins": [
    "http://localhost",
  ],
  "proxy_connect_endpoint": "http://nginx/centrifugo/connect/",
  "proxy_http_headers": [
    "Cookie"
  ],
  "namespaces": [
    {
      "name": "personal"
    }
  ]
}
This configuration defines a connect proxy endpoint which is targeting Nginx and then proxied to Laravel. Centrifugo will proxy Cookie header of WebSocket HTTP Upgrade requests to Laravel – this allows using native Laravel authentication.
We also defined a "personal" namespace – we will subscribe each user to a personal channel in this namespace inside connect proxy handler. Using namespaces for different real-time features is one of Centrifugo best-practices.
Allowed origins must be properly set to prevent cross-site WebSocket connection hijacking.
Connect proxy controller
To use native Laravel user authentication middlewares, we will use Centrifugo proxy feature.
When user connects to Centrifugo it's connection attempt will be transformed into HTTP request from Centrifugo to Laravel and will hit the connect proxy controller:
class CentrifugoProxyController extends Controller
{
    public function connect()
    {
        return new JsonResponse([
            'result' => [
                'user' => (string) Auth::user()->id,
                'channels' => ["personal:#".Auth::user()->id],
            ]
        ]);
    }
}
This controller protected by auth middleware.
Since Centrifugo proxies Cookie header of initial WebSocket HTTP Upgrade request Laravel auth layer will work just fine. So in a controller you already has access to the current authenticated user.
In the response from controller we tell Centrifugo the ID of connecting user and subscribe user to its personal channel (using user-limited channel feature of Centrifugo). Returning a channel in such way will subscribe user to it using server-side subscriptions mechanism.
Note, that in our chat app we are using a single personal channel for each user to receive real-time updates from all rooms. We are not creating separate subscriptions for each room user joined too. This will allow us to scale more easily in the future, and basically the only viable solution in case of room list pagination in chat application like this. It does not mean you can not combine personal user channels and separate room channels for different tasks though.
Some additional tips can be found in Centrifugo FAQ.
Room controller
In RoomController we perform various actions with rooms:
- displaying rooms
- create rooms
- join users to rooms
- publish messages
When we publish a message in a room, we send a message to the personal channel of all users joined to the room using the broadcast method of Centrifugo API. It allows publishing the same message into many channels.
$message = Message::create([
    'sender_id' => Auth::user()->id,
    'message' => $requestData["message"],
    'room_id' => $id,
]);

$room = Room::with('users')->find($id);

$channels = [];
foreach ($room->users as $user) {
    $channels[] = "personal:#" . $user->id;
}

$this->centrifugo->broadcast($channels, [
    "text" => $message->message,
    "createdAt" => $message->created_at->toDateTimeString(),
    "roomId" => $id,
    "senderId" => Auth::user()->id,
    "senderName" => Auth::user()->name,
]);
We also add some fields to the published message which will be used when dynamically displaying a message coming from a WebSocket connection (see Client side below).
Client side
Our chat is basically a one page with some variations dependng on the current route. So we use a single view for the entire chat app.
On the page we have a form for creating rooms. The user who created the room automatically joins it upon creation. Other users need to join manually (using join button in the room).
When sending a message (using the chat room message input), we make an AJAX request that hits RoomController shown above. A message saved into the database and then broadcasted to all users who joined this room. Here is a code that processes sending on ENTER:
messageInput.onkeyup = function(e) {
    if (e.keyCode === 13) {
        e.preventDefault();
        const message = messageInput.value;
        if (!message) {
            return;
        }
        const xhttp = new XMLHttpRequest();
        xhttp.open("POST", "/rooms/" + roomId + "/publish");
        xhttp.setRequestHeader("X-CSRF-TOKEN", csrfToken);
        xhttp.send(JSON.stringify({
            message: message
        }));
        messageInput.value = '';
    }
};
After the message is processed on the server and broadcasted to Centrifugo it instantly comes to client-side. To receive the message we are connecting to Centrifugo WebSocket endpoint and wait for a message in the publish event handler:
const url = "ws://" + window.location.host + "/connection/websocket";
const centrifuge = new Centrifuge(url);

centrifuge.on('connect', function(ctx) {
    console.log("connected to Centrifugo", ctx);
});

centrifuge.on('disconnect', function(ctx) {
    console.log("disconnected from Centrifugo", ctx);
});

centrifuge.on('publish', function(ctx) {
    if (ctx.data.roomId.toString() === currentRoomId) {
        addMessage(ctx.data);
        scrollToLastMessage();
    }
    addRoomLastMessage(ctx.data);
});

centrifuge.connect();
We are using centrifuge-js client connector library to communicate with Centrifugo. This client abstracts away bidirectional asynchronous protocol complexity for us providing a simple way to listen connect, disconnect events and communicate with a server in various ways.
In publish event handler we check whether the message belongs to the room the user is currently in. If yes, then we add it to the message history of the room. We also add this message to the room in the list on the left as the last chat message in room. If necessary, we crop the text for normal display.
In our example we only subscribe each user to a single channel, but user can be subscribed to several server-side channels. To distinguish between them use ctx.channel inside publish event handler.
And that's it! We went through all the main parts of the integration.
Possible improvements
As promised, here is a list with several possible app improvements:
- Transform to a single page app, use productive Javascript frameworks like React or VueJS instead of vanilla JS.
- Add message read statuses - as soon as one of the chat participants read the message mark it read in the database.
- Introduce user-to-user chats.
- Support pagination for the message history, maybe for chat room list also.
- Don't show all rooms in the system – add functionality to search room by name.
- Horizontal scaling (using multiple nodes of Centrifugo, for example with Redis Engine) – mostly one line in Centrifugo config if you have Redis running.
- Gracefully handle temporary disconnects by loading missed messages from the database or Centrifugo channel history cache.
- Optionally replace connect proxy with JWT authentication to reduce HTTP calls from Centrifugo to Laravel. This may drastically reduce resources for Laravel backend at scale.
- Try using Centrifugo RPC proxy feature to use WebSocket connection for message publish instead of issuing AJAX request.
Conclusion
We built a chat app with Laravel and Centrifugo. While there is still an area for improvements, this example is not really the basic. It's already valuable in the current form and may be transformed into part of your production system with minimal tweaks.
Hope you enjoyed this tutorial. If you have any questions after reading – join our community channels. We touched only part of Centrifugo concepts here – take a look at detailed Centrifugo docs nearby. And let the Centrifugal force be with you!
